Often, I need access to AWS resources such as S3, SQS, etc. from an application running on Google Cloud. Using the access and secret keys is rightfully considered a bad practice so I ended up building Janus — a small tool that helps you to assume AWS Role from a Google Cloud Compute Engine instance with a service account.
Why Janus? Because in Roman mythology, Janus, a two-faced god, was the god of gates and doors. I found it a nice analogy in this case ;-)
So what is Janus, exactly? It’s a little piece of code that you can run on your own Google Cloud Compute Engine instance which enables you to assume an AWS Role, without having to use the AWS IAM keys.
Why should you use Janus?
Let’s say you need to retrieve a private file from an S3 bucket from an instance or container running in the Google Cloud. To download the file, you’ll need to authenticate with AWS IAM.
There are a few options for authentication. The safest option is to attach an IAM role to an instance, but it’s possible only with an EC2 instance (instance that runs on AWS infrastructure).
And when you have a Google Cloud instance, your options are limited, so most people choose to generate AWS IAM access keys (often with broader permissions than actually required) and store the key hardcoded.
This creates a substantial security risk of your key being leaked. Once the key has been leaked, anyone who has gained access to the key can access your AWS account. This could result in data leakage or financial damage to your company. The most “innocent” scenario I have encountered is hackers creating crypto mining servers or encrypts the data and backups in the account and demands a ransom to recover the data.
So how do you establish a secure connection from GCP to AWS resources without hardcoded keys?
Janus helps to overcome these limitations by allowing you to assume role using a Google Web Identity on a GCP Compute Engine machine, much like using an IAM role with EC2. Janus will request a temporary key from AWS with a lifetime of 1 hour.
How to implement Janus
As an example, I’ll demonstrate how to grant access to an AWS S3 bucket with read-only permissions, which I will use in my Google Compute instance later.
- Login to your GCP console and choose IAM & Admin from the left-hand navigation menu. Next, click on Service Accounts and then on +CREATE SERVICE ACCOUNT.

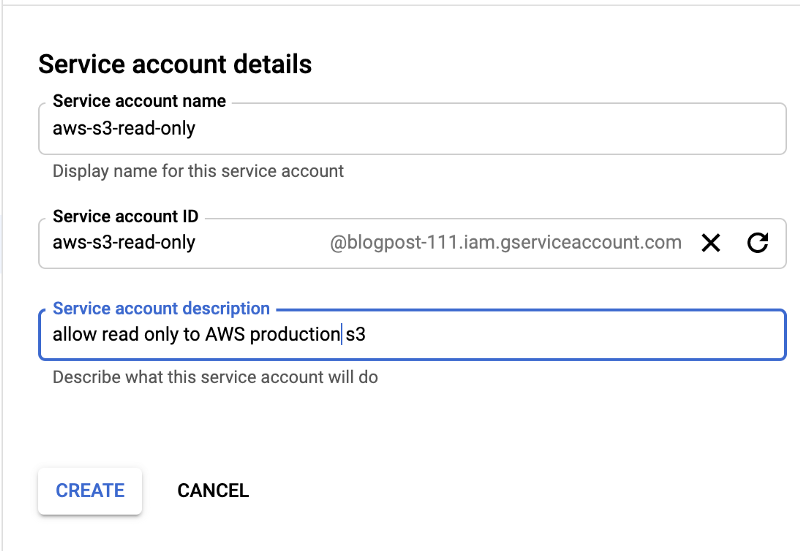
2. Give your service account a name and add a detailed description (it’s always a best practice). Then click on the CREATE button.
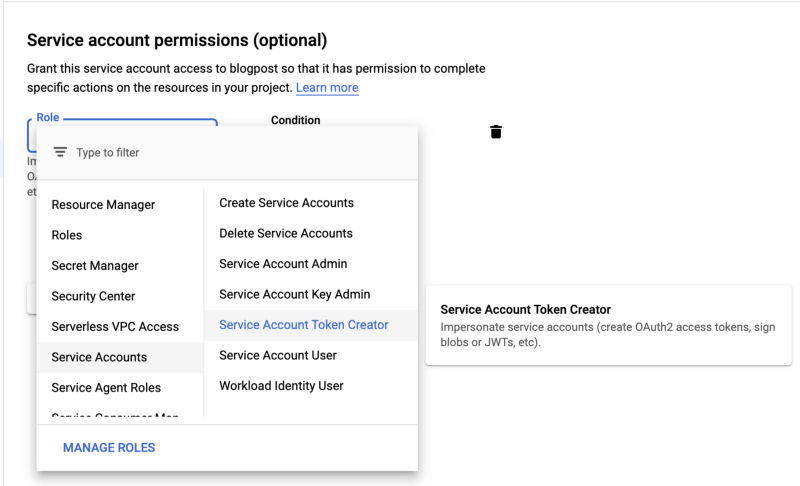
3. After that, click on the Role box and select the Service Account → Service Account Token Creator.
An easier solution would be to type Token in the Type to filter search box.
4. A “Grant users access to this service account (optional)” page will be displayed. When it appears, click on DONE.
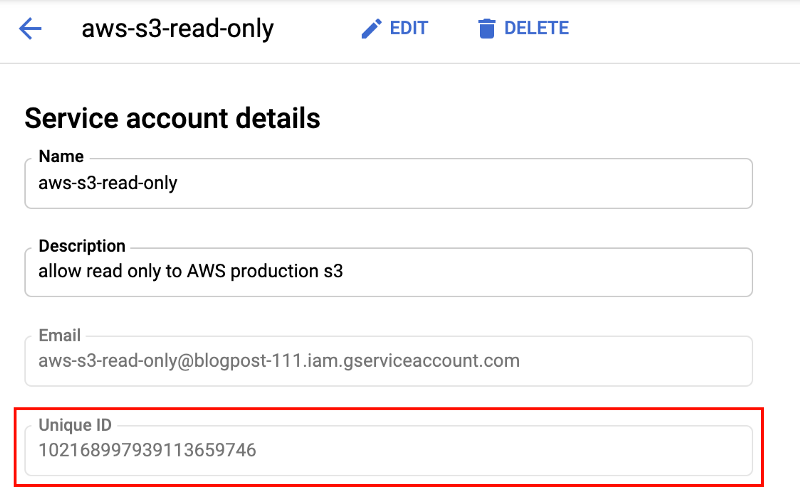
5. Click on the service account name, and copy the Unique ID.
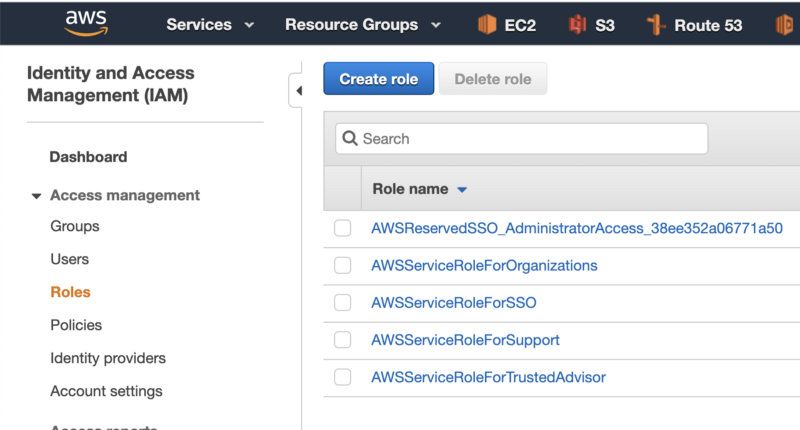
6. Log-in to your AWS account and navigate to IAM console → Roles → Create role.
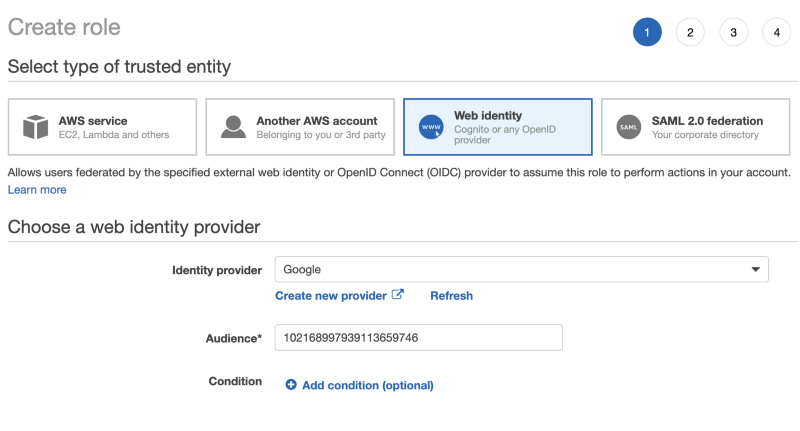
7. As the trusted entity, select Web identity → Google as the Identity provider and paste the GCP service account Unique ID in the Audience box. then click on the Next: Permissions button.
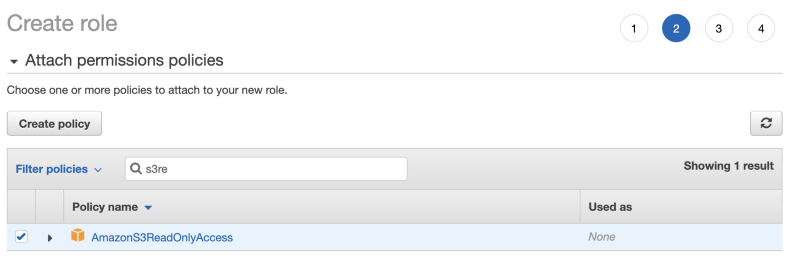
8. Grant permission for the role. For this presentation, we will use AmazonS3ReadOnlyAccess. Click on the Next: Tags button.
9. The tags stage is optional and we will skip it for this presentation. Click on the Next: Review button.
10. Grant a name and a detailed description of the role. and click on Create role.
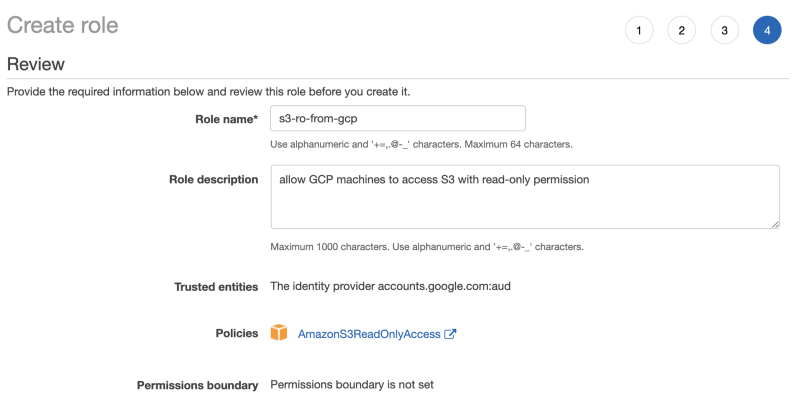
11. The role is ready to be used. Click and copy the Role ARN, to be used in a later step.

12. Return to the GCP Console and create a new compute engine VM instance.
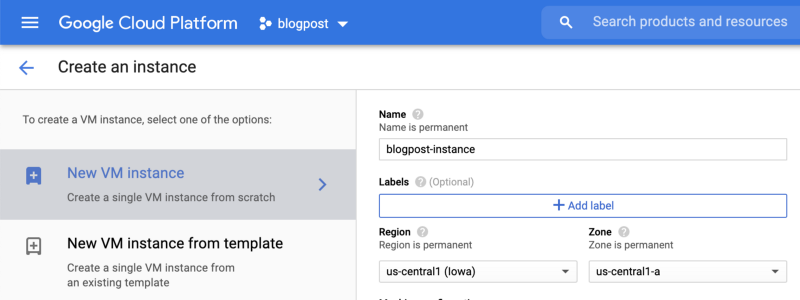
Scroll down a bit, to the Identity and API access section, and replace the Compute Engine default service account with the service account we created in stage 5.

13. Now that both AWS and GCP are set up, and we can assume an AWS Role from GCP, we need a tool or some code to execute the procedure with Google’s web identity. This was the motivation for creating Janus.
Janus returns temporary aws credentials to all supported AWS SDKs and AWS CLI.
To implement Janus, simply run the following commands as the root user:
$ apt install python3-pip awscli
$ pip3 install boto3 requests
$ wget
https://raw.githubusercontent.com/doitintl/janus/master/janus.py
 -O /usr/local/bin/janus
$ chmod 555 /usr/local/bin/janus
To run Janus with the desired IAM role, you will need to add the name of the AWS Role ARN we copied in stage 10.
/usr/local/bin/janus arn:aws:iam::123456789012:role/s3-ro-from-gcp
14. Create a new profile in your ~/.aws/credentials file (~ is a shortcut for the user home directory). AWS’s SDK uses the profiles (as given by this file) to complete the authentication with AWS.
If the file doesn’t exist, create the file:
$ mkdir ~/.aws
$ touch ~/.aws/credentials
Edit the credentials file and add a profile (the default profile name is default). You can have multiple profiles (and for purpose of this presentation) we will create a new default profile:
[default]
credential_process = /usr/local/bin/janus arn:aws:iam::123456789012:role/s3-ro-from-gcp
15. That’s it!!! You can start using AWS from your GCP instance.
As an example, I’m going to copy a file named hello.txt from my AWS s3 bucket using AWS CLI:

How does it work?
~/.aws/credentials on Mac, Linux, and Unix. (~ is a shortcut for the home directory)
or
C:\Users\USERNAME\.aws\credentials on Windows.
- It will then run Janus with the name of the AWS Role that we want to assume.
- Janus will ask for a JWT token from the Compute Engine metadata server, and then it will assume a role to AWS with the AWS Role name.
- AWS validates that the JWT token matches the AWS Role settings, and returns temporary access key:

- With this temporary access key, we can now access AWS and call APIs on behalf of the AWS Role.
How can I track which instance access my AWS account?
For tracking purposes, Janus will assume the role with a custom session name. The session name will be project-id.instance-hostname.
Assuming you have AWS CloudTrail trail enabled in your account, you can filter all the AssumeRoleWithWebIdentity events and track every API called that was made.
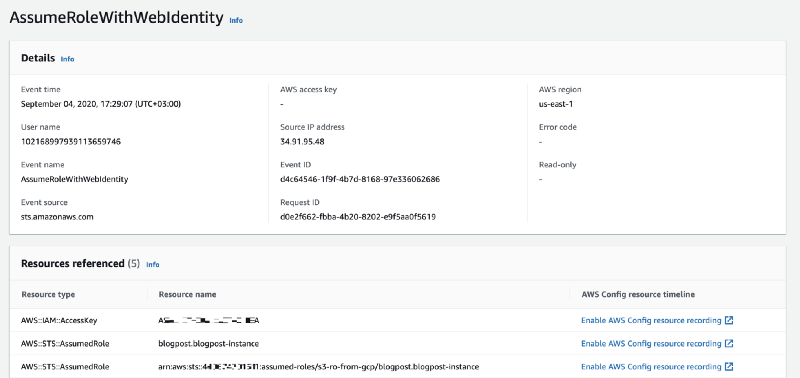
The event will contain the:
- Source IP of the GCP machine.
- username — the GCP Service Account unique id.
- The session role “session name” — Project id and instance name.
- The assumed role name.
Using the Access Key, we can search for all the actions that the instance run.
Avi Keinan is a Senior Cloud Architect at DoiT International. Enjoying this article? You can work with Avi Keinan! Check out our open positions!
