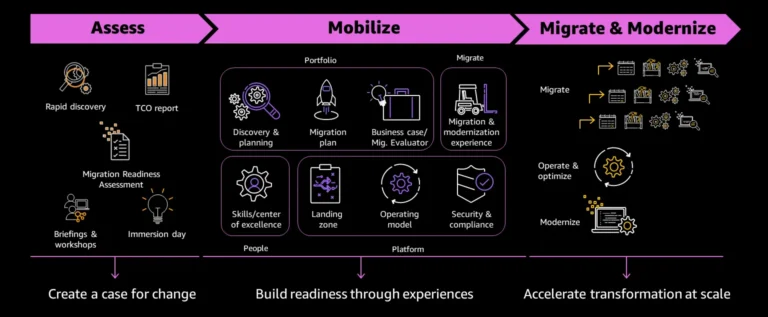
AWS has designed a Migration Acceleration Program (MAP) in order to speed up customers’ migration to AWS journey as smooth as possible, along with added benefits of credits and partner cash to fund the migration project. In the AWS MAP program, the customer gets a certain percentage of credits and partner cash based on the Annual Recurring Revenue (ARR) calculated in the Total cost of Ownership (TCO) in MAP Assess phase as depicted in the diagram below.
Once we pass the Assess phase, then the migration project starts and AWS monitors the spend using the Cost Usage Tag applied to all the newly launched resources that are part of this MAP project. The MAP tag is in this format Key: map-migrated Value: mig123456. Customers undergoing migration receive the credits and partner cash based on certain spend thresholds AWS sets. AWS monitors the cost usage tag ‘map-migrated’ using their mechanism. Hence proper tagging is backbone of a successful MAP project. If a customer misses the tag on certain resources, they will also miss out on the credits and partner cash.
We at DoiT, being an AWS Certified MAP partner, want to make sure the customer applies the MAP tag to all resources to get 100% of the benefits of this MAP program. DoiT has a product called CloudFlow, which is part of their DoiT Cloud Intelligence FinOps platform and can help achieve proper tagging when a customer starts their migration journey.
In this article, we will demo how to automate tagging for EC2 and RDS instances.
Prerequisite:
- AWS Account with Admin Access
- EC2 Instances launched today (*This is just demo so make sure you launch the smallest instances in order to avoid cost)
- Access to AWS CloudShell
1) Navigate to DoiT CloudFlow:
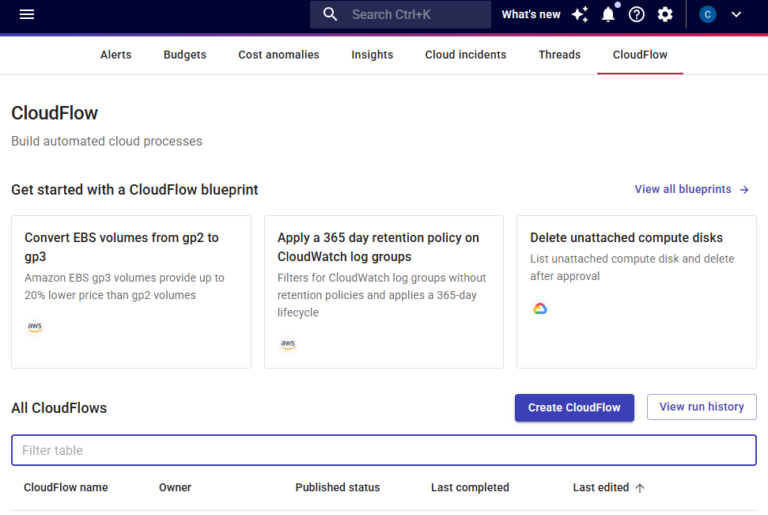
2) Click on Create CloudFlow:
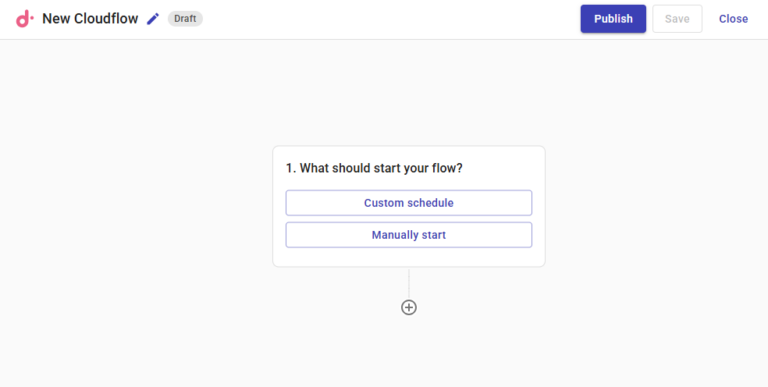
You can name the CloudFlow just by clicking in the text bar top left next to the DoiT logo. CloudFlow has two ways to trigger as below. For this demo we will be doing Manual Trigger:
Manual Trigger: Using this you can control when to run the CloudFlow Template on Demand.
Custom Schedule: You can schedule this CloudFlow to run daily, weekly, or monthly as required. Think of this as a Cron Job concept.
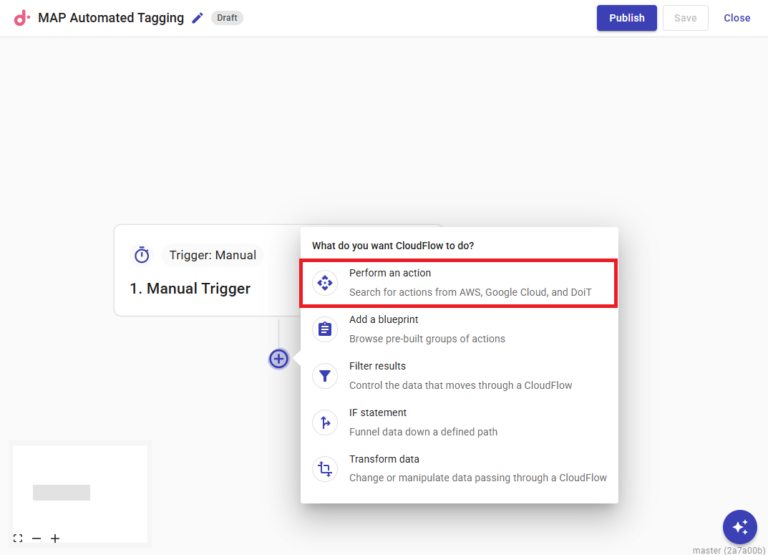
3) Perform an Action:
The logic we are going to use here is to search for all the EC2 instances that were recently launched. To do this, click the “Perform an action” option.
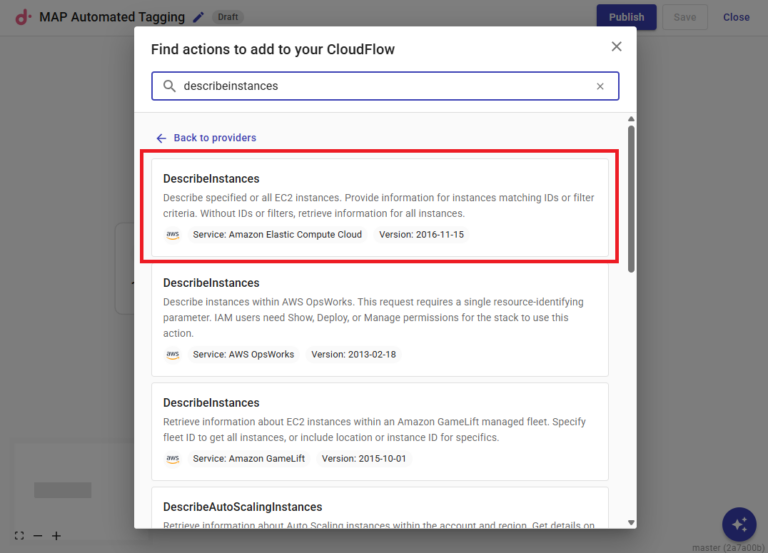
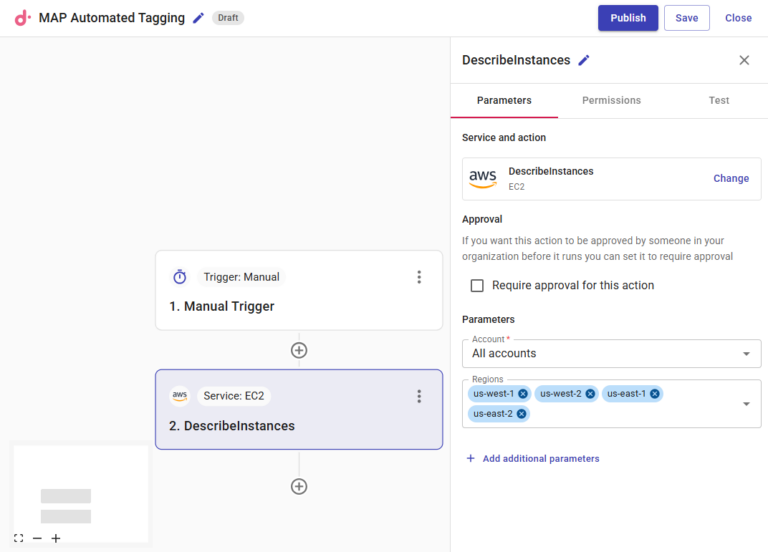
Search for DescribeInstances EC2 Action API Call. Make sure you select the EC2 and not any other resource.
When you click on the DescribeInstances box, it opens up a configuration menu, where you must select your AWS account number and your region. There are "All accounts" and "All regions" options available in the dropdowns if you want to apply this to a broad swath of your infrastructure.
Now it's time to configure your permissions. CloudFlow provides very granular permissions via cli commands in build, so you don’t have to worry about the resource access that CloudFlow will have.
In the permission tab when you click on “Check for required permissions” CloudFlow uses a role named “doitintl-cmp” (this role is created when you attach your AWS Account to CloudFlow; to learn more into how to attach an AWS Account to CloudFlow, you can read the detailed documentation here). CloudFlow will check for required permission to run that API call and if it is unavailable, it will create an AWS cli command for you.
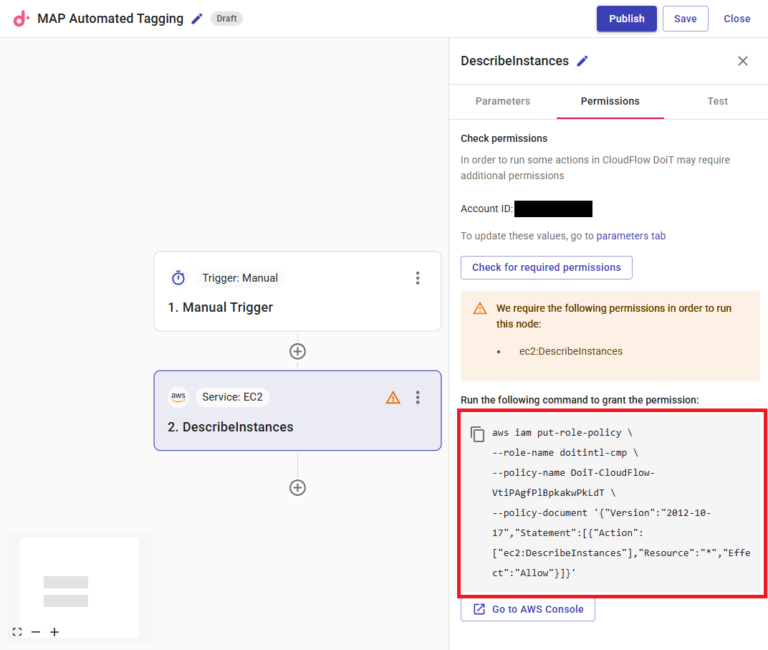
Copy that command and run it in your AWS CloudShell and voila -- you have the required permission nice and easily without any need to go to the IAM console and try to figure out the correct json permissions, services, etc. Once you run the command and click on check permissions again, you will see the message “All permissions are in place to run this action.”
4) Filter out EC2 launched after today’s date:
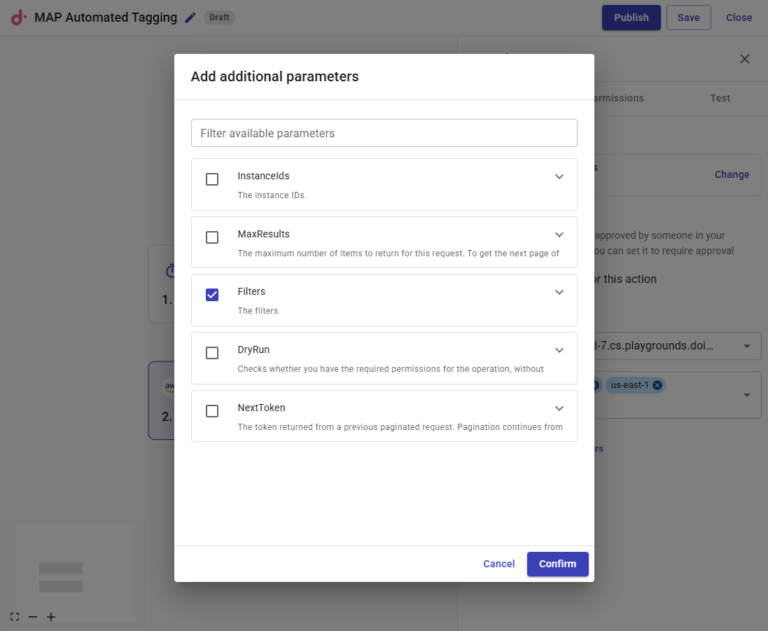
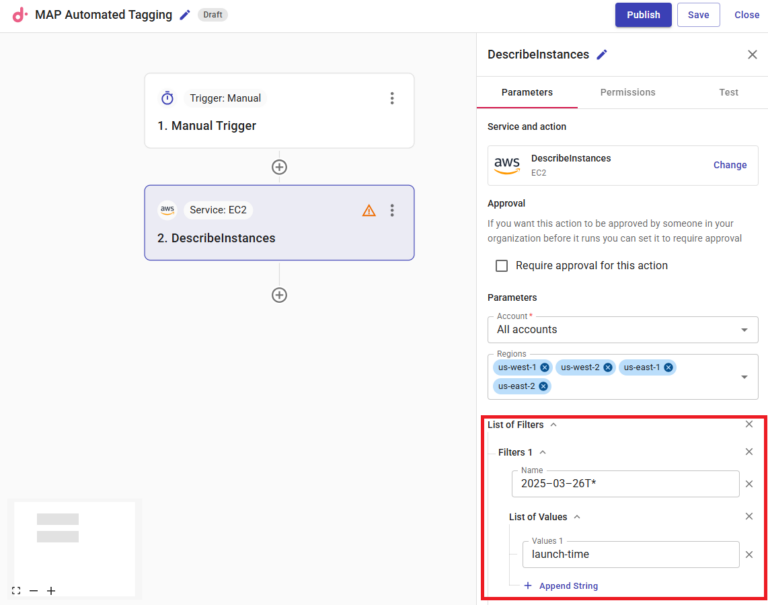
Now you need to filter out the EC2s launched after today’s date. AWS MAP credits are not retroactive, so in short, you will not get credits for AWS Resources launched before the AWS MAP Opportunity approval date. Below is how you filter out the EC2s launched after today’s date. Click on “Add additional parameters” and select “Filters.”
Click on “Add additional Filters 1 parameters” and select “Values” and “Name.”
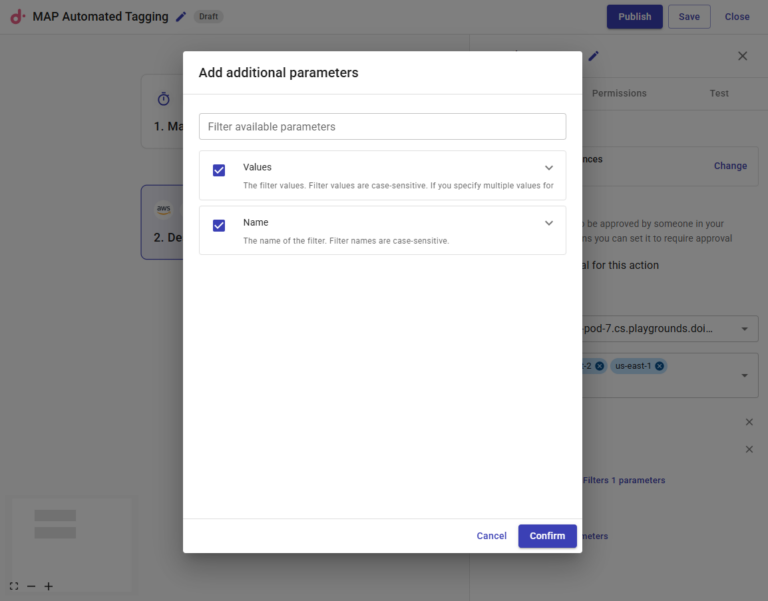
Add “launch-time” to the name field and the today’s date wild card “2025–03–12T*”
5) Create map-migrated tag:
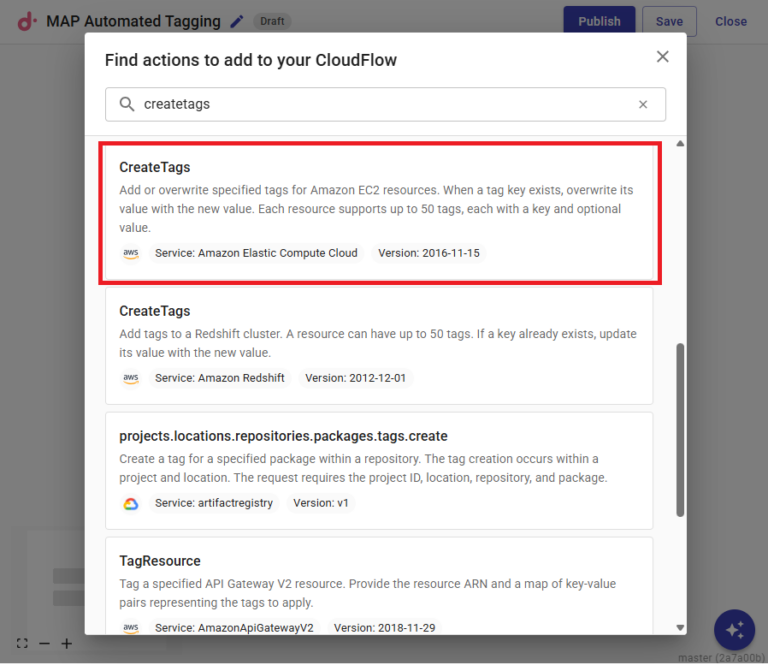
Next, go back to the workflow to create a new step, once again selecting 'Perform an new action' and then searching for “Create Tags” for AWS EC2.
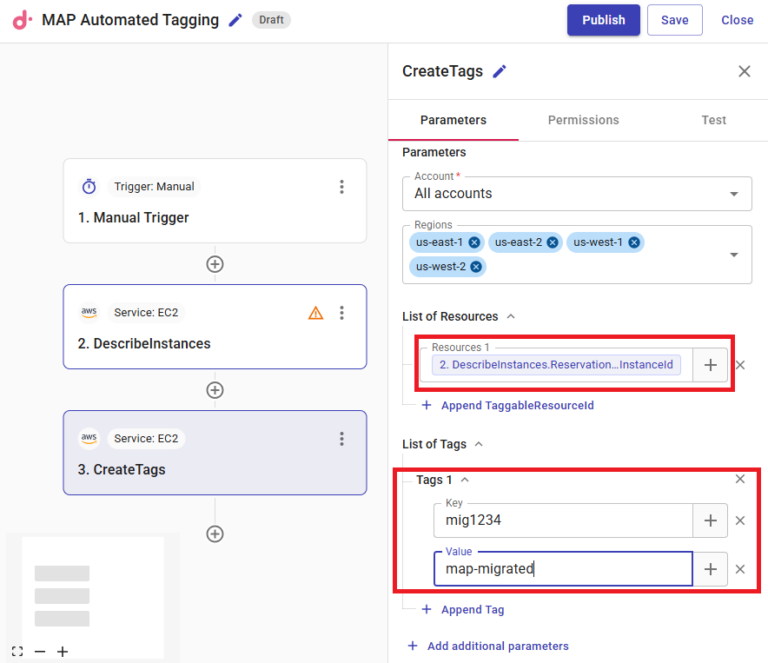
After selecting create tag, select the InstanceID as the filter, and in list of tags select both Key and Value as identifiers.
The key is the most important part and is unique and case sensitive; make sure there are no mistakes or typos, or else AWS will not see the tag spend and you will end up with no credits for the current quarter.
For our purposes, the key will be 'mig1234' and the value will be 'map-migrated.'
6) Tag RDS instances
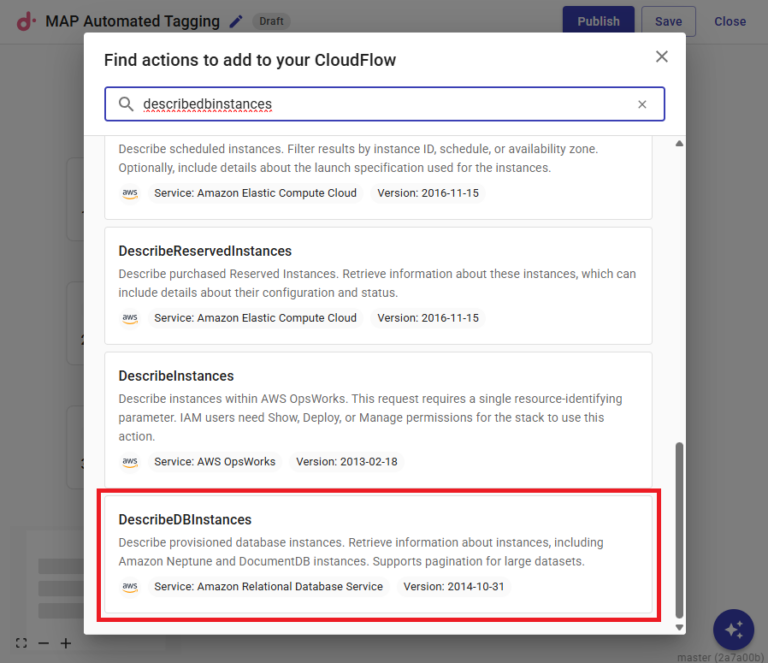
In addition to tagging your EC2 MAP workloads, you can also create similar steps for your RDS workloads. To do this, you will have to use the “DescribeDBInstances” API call for filtering newly-launched RDS instances.
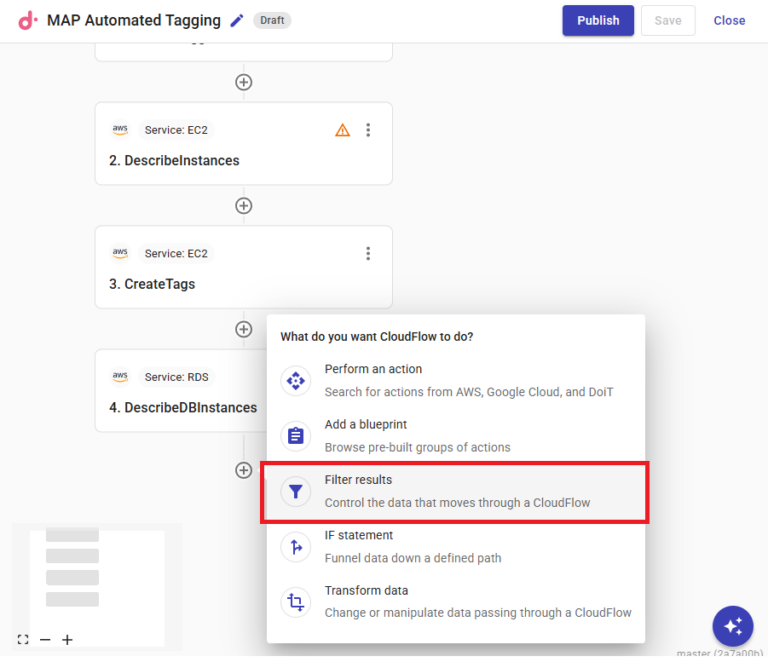
Next, you'll want to create a new step, and this time select 'Filter results.'
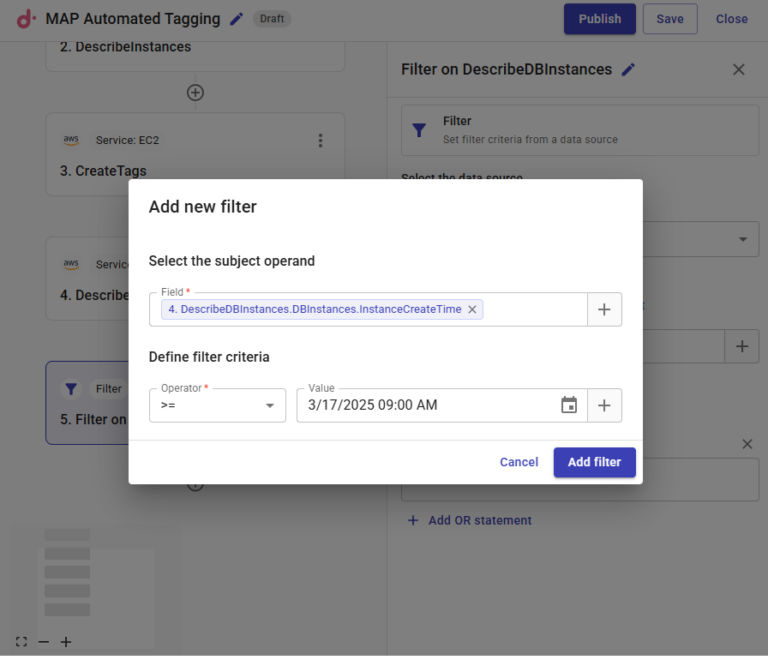
To configure the step, you'll need to select your data source (the previous step, 'DescribeDBInstances') and then add a filter for anything created after the MAP opportunity was approved (hypothetically March 17 at 9 am).
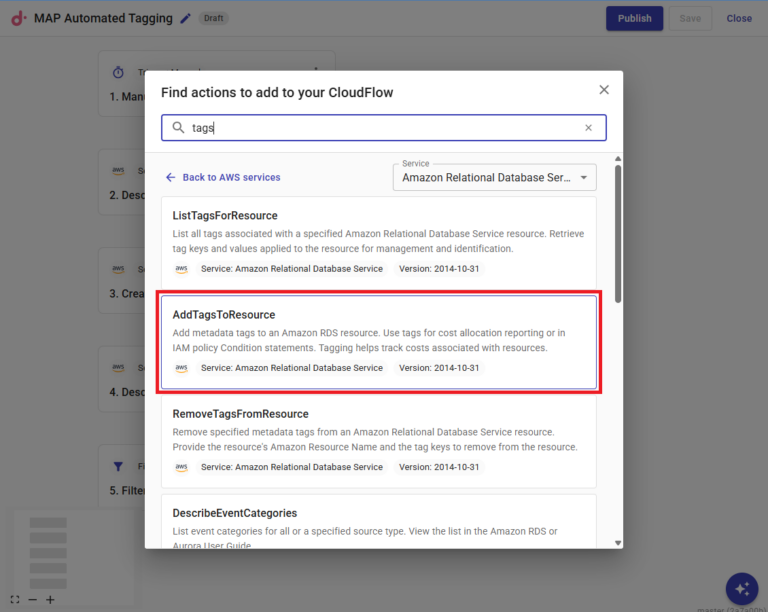
Now that's done, all that's left is to add the newly created tag to the RDS instances, and then run your CloudFlow. Go back to the workflow and add one final API call, this time named 'AddTagsToResource' for Amazon RDS.
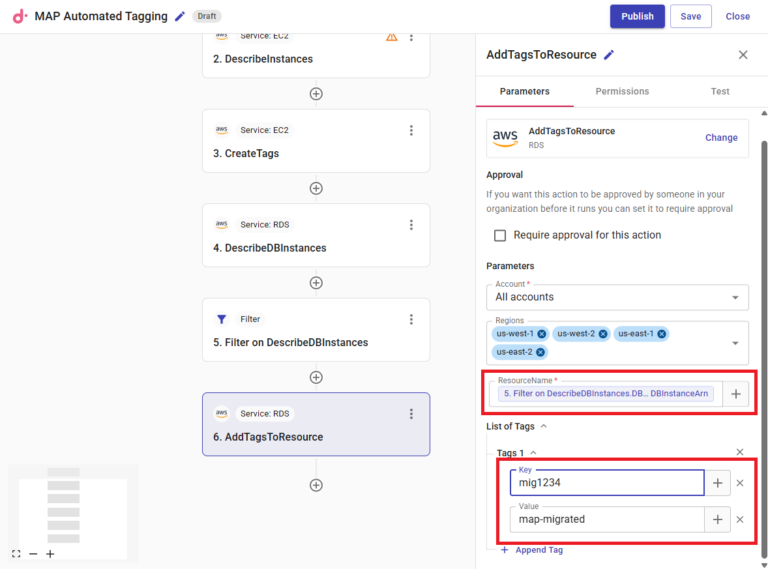
To configure this step, you'll select the string from the previous filter step as the Resource Name, and then add another Key and Tag that aligns with your previous ones for the EC2 instances.
Once that's done, you just click publish to run the CloudFlow. You can see the tag getting added to your EC2 and RDS instances that you launched today, as well as any other workloads that you launch after today’s date. To ensure all the EC2 and RDS instances are tagged with the map-migrated tag after today’s date, you can also schedule the CloudFlow to run daily.
To learn more about DoiT CloudFlow and how it can help turn cloud savings recommendations into real outcomes, get in touch with a DoiT expert today.