Avoid unknown accruing cloud costs by labeling your instances upon start.
Identifying “John Doe” Instances
When reviewing your Google Cloud Compute Engine usage, you may find instances or disks without a name, or even worse, with a name that isn’t clear. These resources might be a complete waste of money or critical to production workloads.
The instances could be several years old, with no one in the organization having information about the instances or the credentials to connect to the instances.
To avoid this problem, companies enforce label policies, where every instance you provision must have a Name/Owner/Project/etc. label.
There is no additional cost for labels in Google Cloud Compute Engine.
…however, since people are launching instances and writing automation scripts that launch instances, this process can be error-prone.
To avoid these cases, I created an auto-labeling solution for Google Cloud (a similar one for AWS can be found here) that automatically labels the instances with the created-by label and the disks with created-by and instance labels.
So in the future, if someone encounters an instance or disk whose purpose is unknown, these labels will make it easier to identify who set it up.
Google Cloud labels are limited to a specific set of characters. Therefore, the script will replace the user email at sign (@) with underscore (_), and dot (.) with hyphen (-).
How does auto-labeling work?

A new Compute Engine machine is created by a user or a service account.
- The API call is logged to StackDriver, using StackDriver sink (also known as Operations Logging) the event is sent to Cloud Pub/Sub.
- Cloud Pub/Sub invokes a Cloud Function with the event information.
- Cloud Functions labels the instance and the instance disks.
How to implement auto-labeling for instances & disks
If this is the first time you deploy a function, make sure that Cloud Build API is enabled.
1. Create a dedicated service account with the least privileges
This stage is optional but highly recommended!
When you create a new cloud function, by default the function will use the App Engine service account with the project-wide Editor role permission.
The Editor role permission will grant the function access to modify resources in the entire project, for security reasons, you would like to grant the function the least permissions as possible. in case of an error, the function will be limited only to a limited set of permissions that allows the function to list the instances and disks information and set labels for instances and disks:
# GCP IAM Permissions required for the function:
compute.disks.get
compute.disks.setLabels
compute.instances.get
compute.instances.setLabels
Creating a Service Account with a custom role is a bit complex and requires multiple stages on different screens, to make it easier, here are the gcloud commands to create a service account:
# Replace <project-id> with your project id.
gcloud iam roles create autolabel_instances  --title=autolabel-instances --project <project-id> --description='cloud function service account to label instanes and disks upon creation'  --permissions=compute.disks.get,compute.disks.setLabels,compute.instances.get,compute.instances.setLabels --stage=GA
gcloud iam service-accounts create autolabel-instances
gcloud projects add-iam-policy-binding <project-id> --member serviceAccount:autolabel-instances@<project-id>.iam.gserviceaccount.com --role projects/<project-id>/roles/autolabel_instances
gcloud projects add-iam-policy-binding <project-id> --member serviceAccount:autolabel-instances@<project-id>.iam.gserviceaccount.com --role roles/logging.logWriter
The new service account email address is autolabel-instances@<project-id>.iam.gserviceaccount.com
2. Go to the Cloud Functions page and click on CREATE FUNCTION.

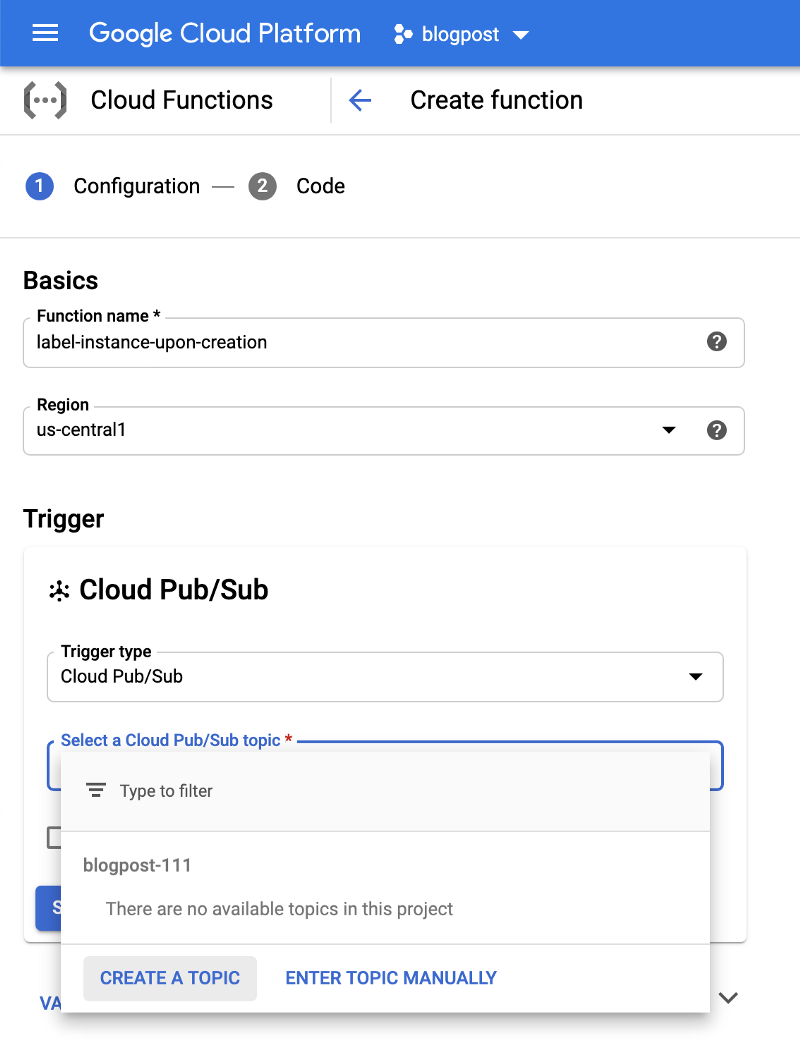
a) Give the function a name, and change the trigger to Cloud Pub/Sub, Then at the box below, click on CREATE A TOPIC and give the new topic a title.

b) If you skipped the creation of the service account, click on the SAVE and Next buttons, if not, click on VARIABLES, NETWORKING AND ADVANCED SETTINGS, and pick the service account you created, then, click on SAVE and NEXT buttons.
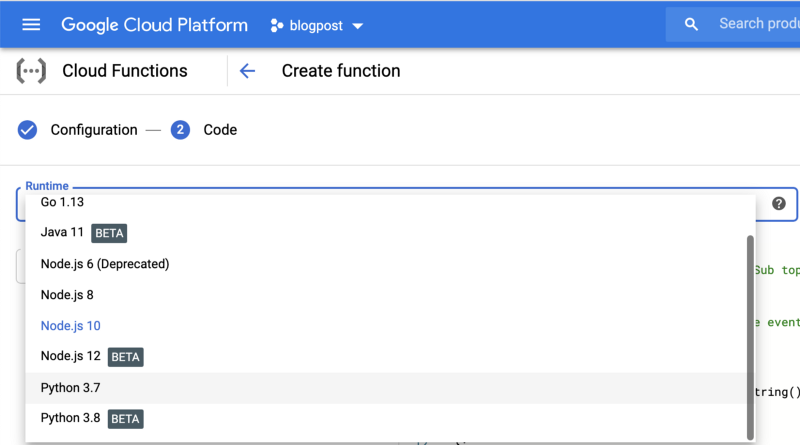
c) Change the function runtime to Python 3.7,

Then, Click on Source code and change it to ZIP Upload, you can download the zip file from our GitHub repository (it also contains the source code of the function). and click on DEPLOY.
3. Go to StackDriver Logging
At the search box, click on the arrow (located on the right) and switch to advanced filter, paste the following:
resource.type="gce_instance"
jsonPayload.event_subtype="compute.instances.insert"
jsonPayload.event_type="GCE_API_CALL"
Then, click on CREATE SINK. give the Sink a name, change the Sink service to Pub/Sub, and set the Sink Destination to the Pub/Sub topic you created at the previous step. Finally, click on Create Sink.

4. Launch an instance to test that the function works.
Go to VM instances page, the new instance should be automatically labeled.

Go to the Disks page, the instance disks should be automatically labeled.

Notes:
This solution will label only newly-created instances after you installed the Cloud Function.
We have open-sourced Iris, — a complete solution created by DoiT International to automatically label Google Cloud resources.


