In today’s digital landscape, ensuring the security and privacy of online communication is of utmost importance. SSL certificates play a critical role in establishing secure connections, protecting sensitive data, and fostering trust between users and websites.
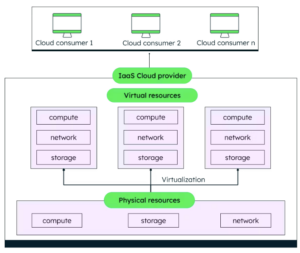
When setting up SSL certificates in Google Cloud Platform (GCP) for load balancers, the verification of domain ownership is a key factor. Traditionally, load balancer-based authorization has been the preferred method. It involves mounting a Google-Managed SSL certificate on a load balancer and associating the domain to the load balancer’s IP using an A record.
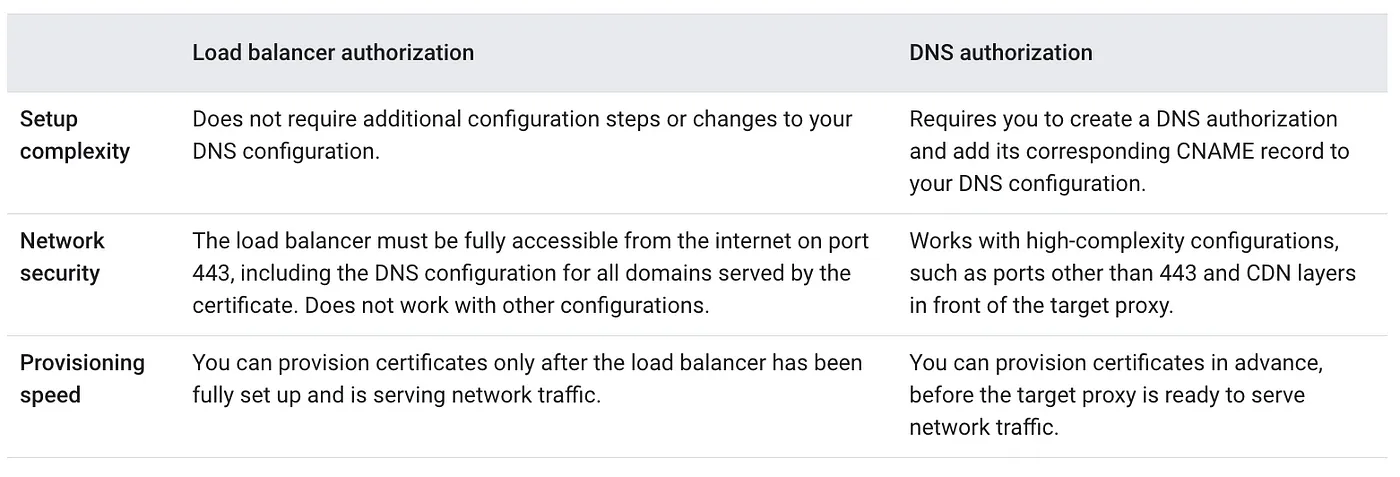
Setting up managed SSL certificates through load balancer-based authorization can be time-consuming and error-prone. First, users must complete all configuration steps before provisioning the TLS (SSL) certificate. This can lead to delays if users make mistakes or forget to complete a step. Second, global DNS record propagation can take up to 48 hours. This means that there is a typical window of 10–15 minutes where the SSL certificate’s domain is inaccessible. As a result, this approach is most suitable for setting up new environments without production traffic.
To overcome these challenges and ensure that Google-managed certificates are ready ahead of load balancer or migration to Google Cloud from another vendor, Domain authorization offers an alternative solution. With Domain authorization, additional dedicated DNS records are configured to verify domain ownership. This enables the provisioning of certificates in advance, even before the target proxy is fully prepared to handle network traffic. As a result, zero-downtime migrations from third-party solutions to Google Cloud become feasible, providing a smoother transition process.
Refer to the below table for differences between Load balancer authorization and Domain authorization.
This article will show you how to set up domain authorization and create new certificates in the certificate manager using domain authorization.
Prerequisites
- A public DNS zone in Cloud DNS
Domain authorization also works with other DNS providers and the .
- Certificate manager API enabled in the GCP project.
- gcloud CLI.
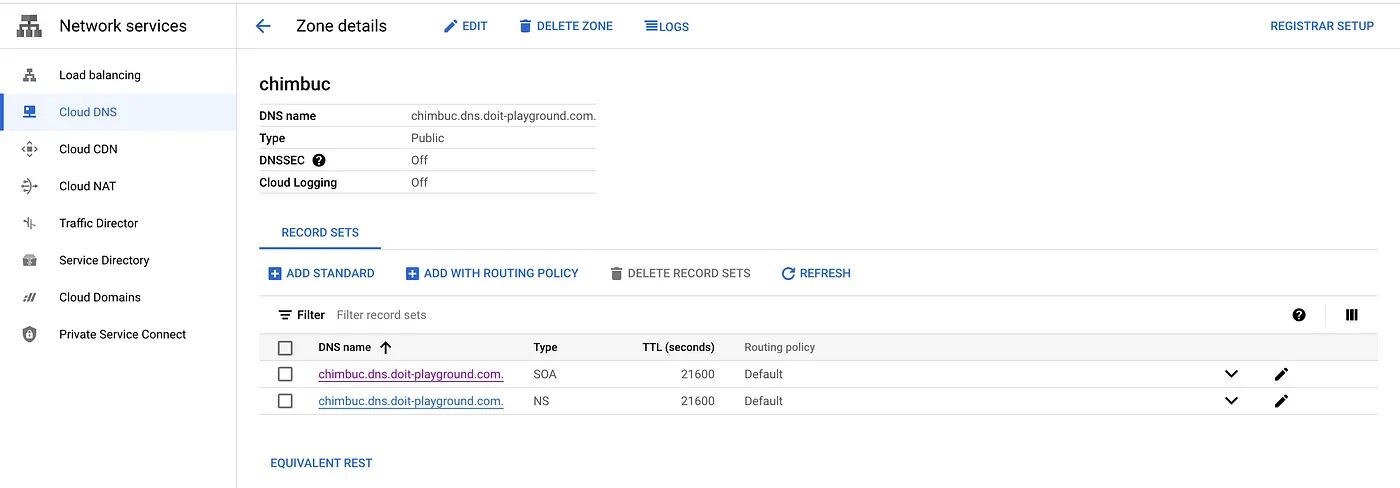
For this article, I am using the Public zone chimbuc.dns.doit-playground.com in Cloud DNS.
Set up DNS authorization
- Set up the necessary env variables.
export PROJECT_ID="your-project-id"
export REGION="your-region" # ex: us-central1
export DOMAIN_NAME="domain-name-for-the-certificate" # ex: example.chimbuc.dns.doit-playground.com
export DOMAIN_AUTHORIZATION_NAME="dns-authorization-resource-name" # ex: dns-authorization-example
export CLOUD_DNS_ZONE_NAME="your-cloud-dns-zone" # ex: chimbuc.dns.doit-playground.com.
export CERTIFICATE_NAME="certificate-manager-cert-name" # ex: example-chimbuc-dns-doit-playground-com
export CERTIFICATE_MAP_NAME="certificate-map-name" # ex: example-dns-authorization-cert-map
export CERTIFICATE_MAP_ENTRY_NAME="certificate-map-entry" # ex: example-dns-authorization-cert-map-entry
- Create a DNS authorization for your domain. Because each DNS authorization covers only a single hostname, you must create a DNS authorization for each hostname you want to use with the target certificate.
If you’re creating DNS authorization for a wildcard certificate, such as *.example.com , configure the DNS authorization for the parent domain (such as example.com ).
gcloud certificate-manager dns-authorizations create $DOMAIN_AUTHORIZATION_NAME \
     --domain="${DOMAIN_NAME}" \
     --project $PROJECT_ID

DNS authorization for example.chimbuc.dns.doit-playground.com
- Get the CNAME record details which you must add to your DNS configuration.
gcloud certificate-manager dns-authorizations describe $DOMAIN_AUTHORIZATION_NAME \
    --project $PROJECT_ID

DNS authorization details for example.chimbuc.dns.doit-playground.com
- Add the CNAME record to your DNS configuration. If you’re using Google Cloud to manage your DNS, complete the steps in this section. Otherwise, consult the documentation for your third-party DNS solution.
#Initiate the DNS record transaction
gcloud dns record-sets transaction start --zone="${CLOUD_DNS_ZONE_NAME}" \
  --project $PROJECT_ID

#Add the CNAME record to the target DNS zone
gcloud dns record-sets transaction add CNAME_RECORD_DATA \
  --name="_acme-challenge.${DOMAIN_NAME}." \
  --ttl="30" \
  --type="CNAME" \
  --zone="${CLOUD_DNS_ZONE_NAME}" \
  --project $PROJECT_ID

#Execute the DNS record transaction to save your changes
gcloud dns record-sets transaction execute --zone="${CLOUD_DNS_ZONE_NAME}" \
  --project $PROJECT_ID
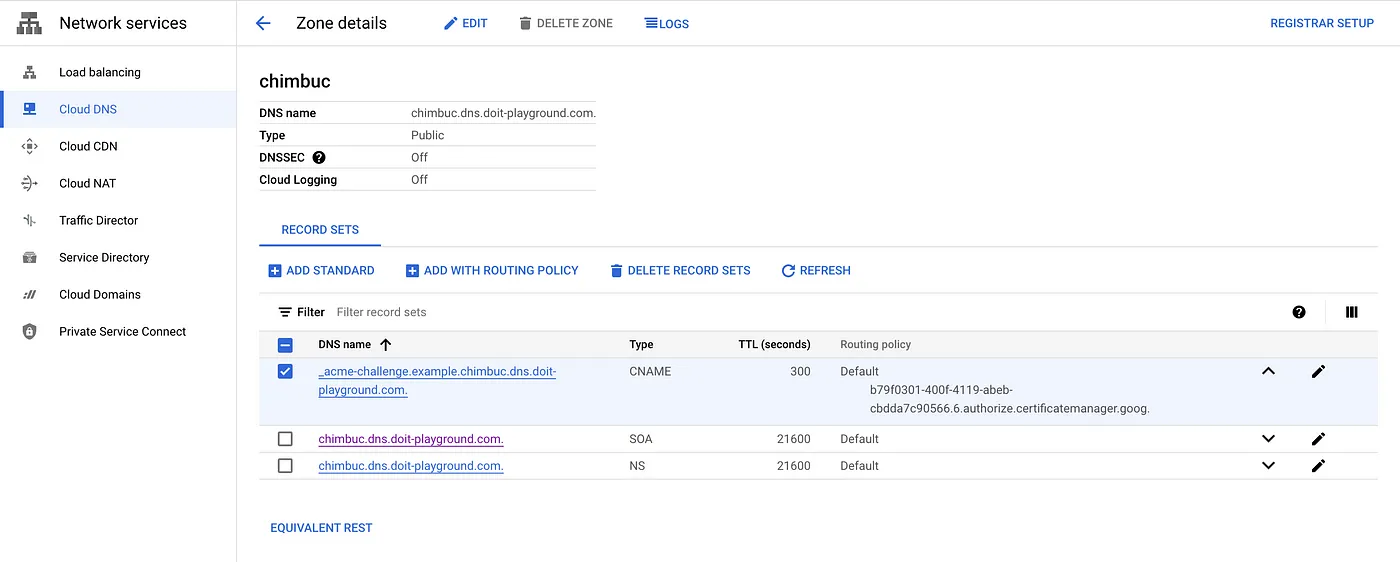
DNS configuration
Create a Google-managed certificate with DNS authorization
- Create the certificate for the domain that is configured with DNS authorization. You can only create Google-managed certificates in the global location.
gcloud certificate-manager certificates create $CERTIFICATE_NAME \
  --domains="${DOMAIN_NAME}" \
  --dns-authorizations="${DOMAIN_AUTHORIZATION_NAME}" \
  --project $PROJECT_ID

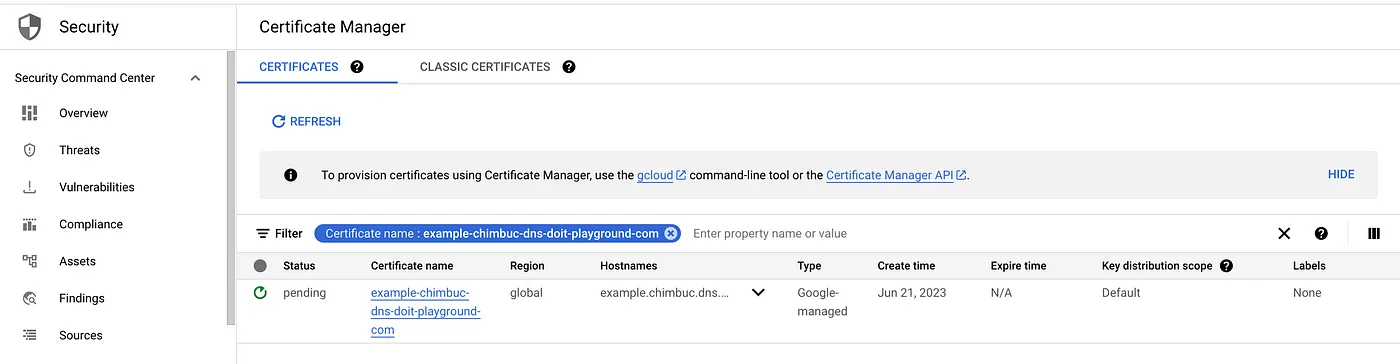
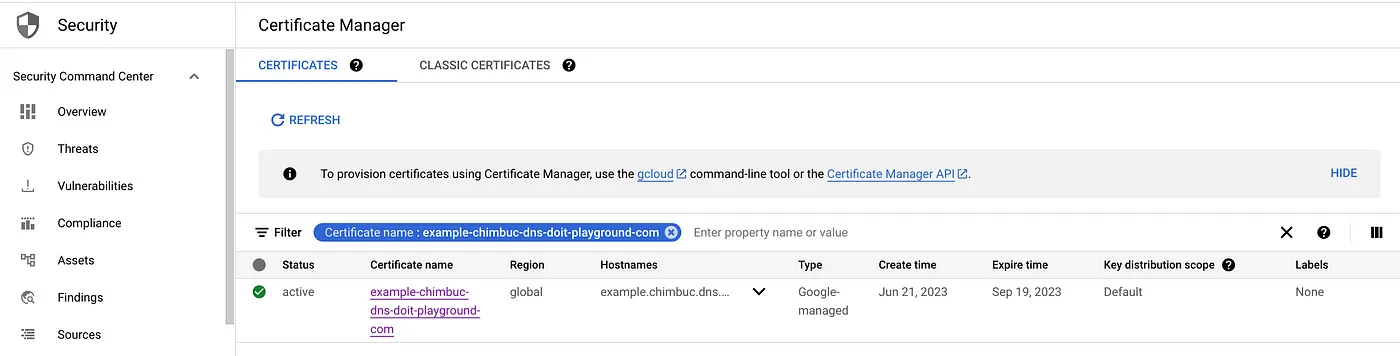
Allow a few minutes for the certificate to be provisioned. Once it is complete, the status will change to active. If the status is Pending for an extended period, then Click the certificate name to view the failure reasons.
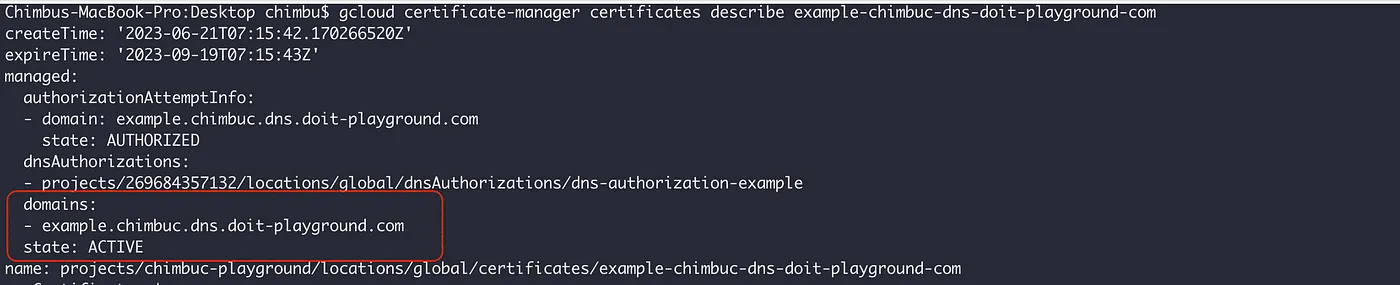
- Verify the certificate status.
gcloud certificate-manager certificates describe $CERTIFICATE_NAME --project $PROJECT_ID
To deploy the generated certificate to a load balancer, we must create a certificate map that references one or more certificate map entries that assign specific certificates to specific hostnames. Refer to How Certificate Manager Works for more details.
- Create a certificate map.
gcloud certificate-manager maps create $CERTIFICATE_MAP_NAME --project $PROJECT_ID
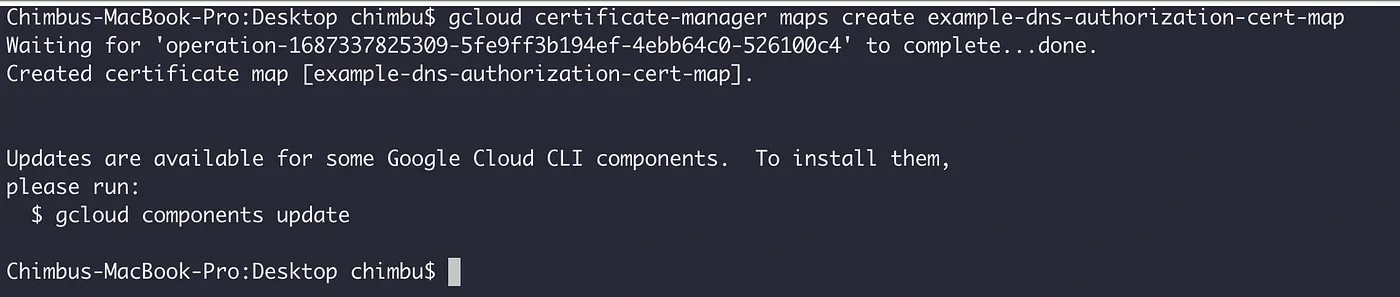
Certificate Map
- Create a certificate map entry for the domain.
gcloud certificate-manager maps entries create $CERTIFICATE_MAP_ENTRY_NAME \
  --map="${CERTIFICATE_MAP_NAME}" \
  --certificates="${CERTIFICATE_NAME}" \
  --hostname="${DOMAIN_NAME}" \
  --project $PROJECT_ID

Certificate Map entry
Allow a few minutes for the certificate map entry to be provisioned, and the status is changed to active.
gcloud certificate-manager maps entries describe $CERTIFICATE_MAP_ENTRY_NAME \
  --map="${CERTIFICATE_MAP_NAME}" \
  --project $PROJECT_ID

Deploy a sample application
- Create a managed instance group and install Apache.
#Create an instance template.
gcloud compute instance-templates create web-app-instance-template \
  --region=$REGION \
  --project $PROJECT_ID \
  --network=default \
  --subnet=default \
  --tags=allow-health-check \
  --image-family=debian-10 \
  --image-project=debian-cloud \
  --metadata=startup-script='#! /bin/bash
     apt-get update
     apt-get install apache2 -y
     a2ensite default-ssl
     a2enmod ssl
     vm_hostname="$(curl -H "Metadata-Flavor:Google" \
   http://metadata.google.internal/computeMetadata/v1/instance/name)"
   echo "Page served from: $vm_hostname" | \
   tee /var/www/html/index.html
   systemctl restart apache2'

#Create the managed instance group based on the template.

gcloud compute instance-groups managed create web-app-instance-group \
  --template=web-app-instance-template \
  --size=1 \
  --zone="${REGION}"-b \
  --project $PROJECT_ID

#Add a named port to the instance group

gcloud compute instance-groups set-named-ports web-app-instance-group \
  --named-ports http:80 \
  --zone "${REGION}"-b \
  --project $PROJECT_ID
- Create a firewall rule to allow traffic from the Google Cloud health checking systems.
gcloud compute firewall-rules create fw-allow-health-check \
  --network=default \
  --action=allow \
  --direction=ingress \
  --source-ranges=130.211.0.0/22,35.191.0.0/16 \
  --target-tags=allow-health-check \
  --rules=tcp:80 \
  --project $PROJECT_ID
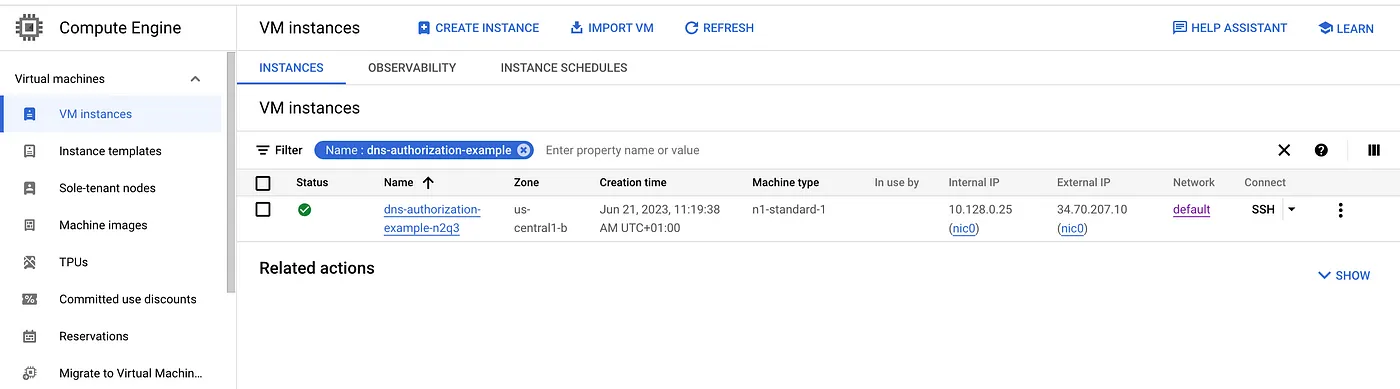
sample instance
Deploy the certificate to a load balancer
- Create the load balancer resources.
#Reserve an external ip
gcloud compute addresses create external-lb-ipv4 \
  --ip-version=IPV4 \
  --network-tier=PREMIUM \
  --global \
  --project $PROJECT_ID

#Create a health check
gcloud compute health-checks create http http-basic-check \
  --port 80 \
  --project $PROJECT_ID

#Create a backend service
gcloud compute backend-services create web-app-backend-service \
  --load-balancing-scheme=EXTERNAL \
  --protocol=HTTP \
  --port-name=http \
  --health-checks=http-basic-check \
  --global \
  --project $PROJECT_ID

#Add the instance group as the backend to the backend service.
gcloud compute backend-services add-backend web-app-backend-service \
  --instance-group=web-app-instance-group \
  --instance-group-zone="${REGION}"-b \
  --global \
  --project $PROJECT_ID

#create a URL map to route the incoming requests to the default backend service
gcloud compute url-maps create web-app-url-map-https \
  --default-service web-app-backend-service \
  --project $PROJECT_ID
- Create a target HTTPS proxy to route requests to the URL map and attach the certificate map to the target proxy.
gcloud compute target-https-proxies create https-lb-proxy \
  --url-map=web-app-url-map-https \
  --certificate-map="${CERTIFICATE_MAP_NAME}" \
  --project $PROJECT_ID
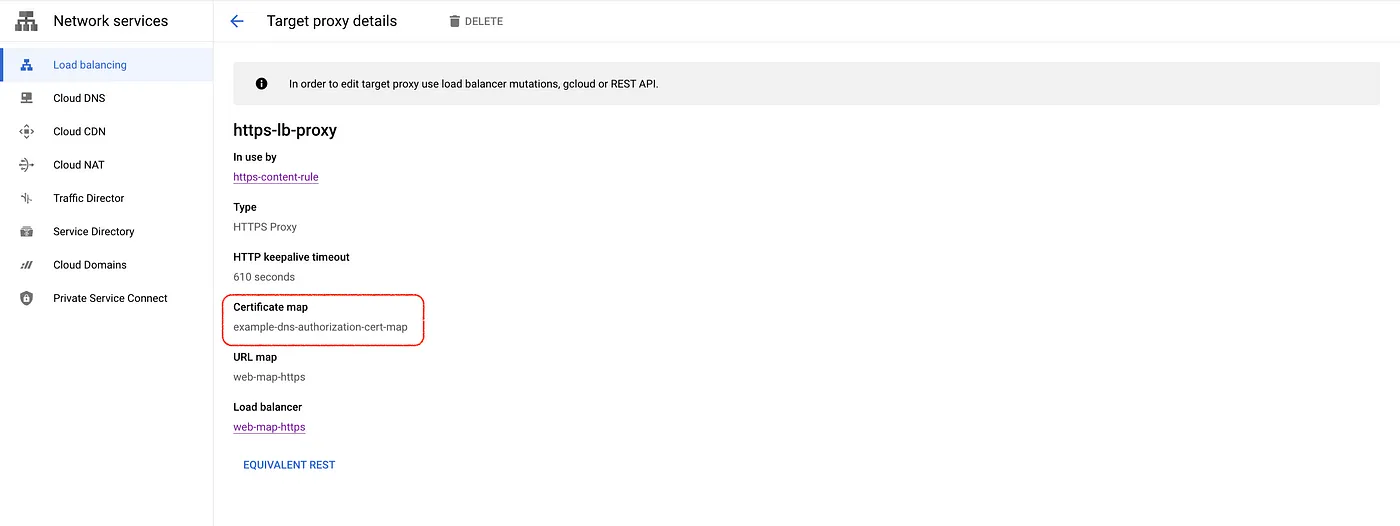
The certificate is attached to the target HTTPS proxy
- Create a global forwarding rule to route incoming requests to the proxy.
gcloud compute forwarding-rules create web-app-https-fw-rule \
  --load-balancing-scheme=EXTERNAL \
  --network-tier=PREMIUM \
  --address=external-lb-ipv4 \
  --global \
  --target-https-proxy=https-lb-proxy \
  --ports=443 \
  --project $PROJECT_ID
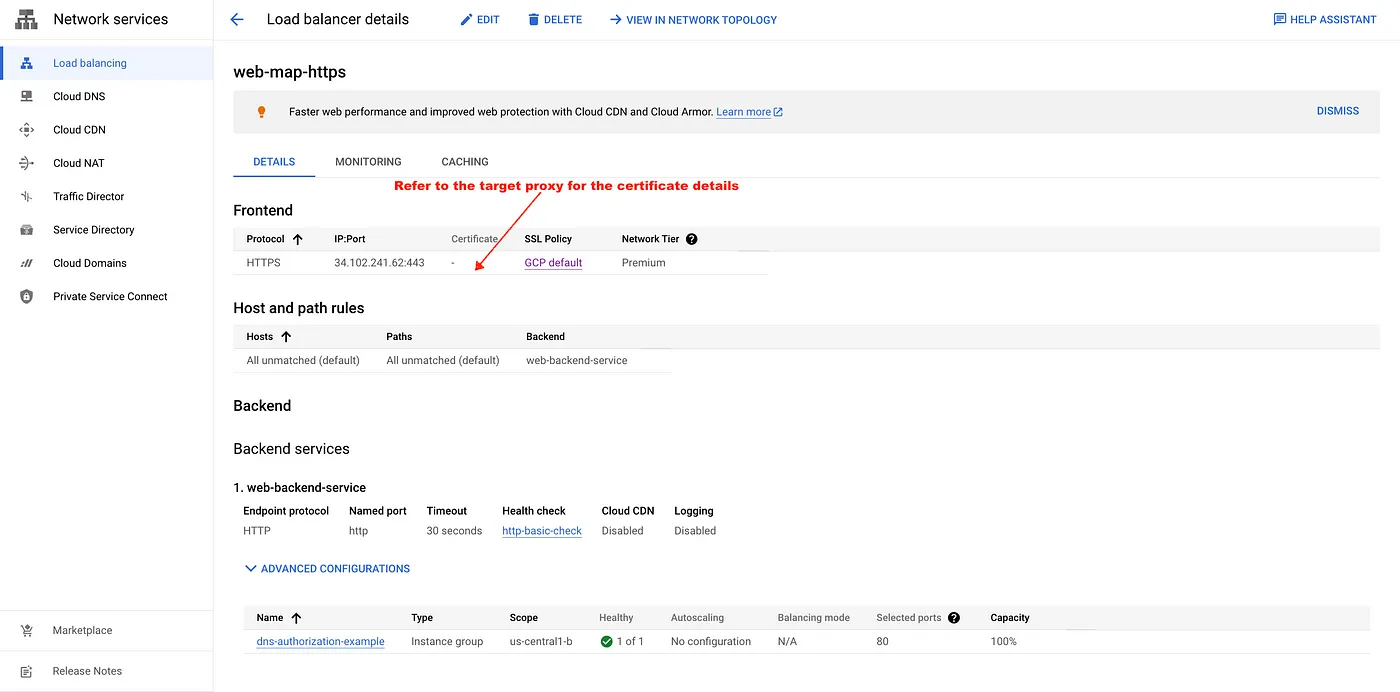
External LB configuration
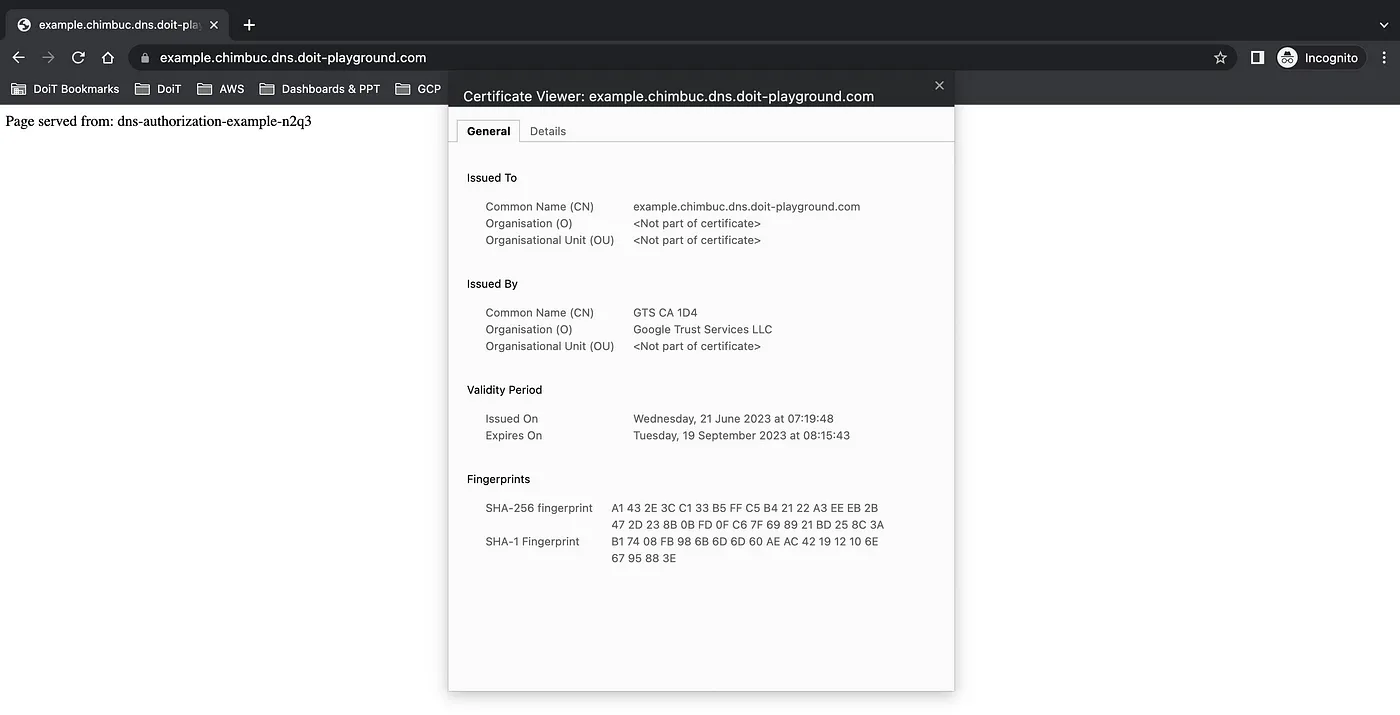
- Create a record set in cloud DNS for the domain and access the endpoint.
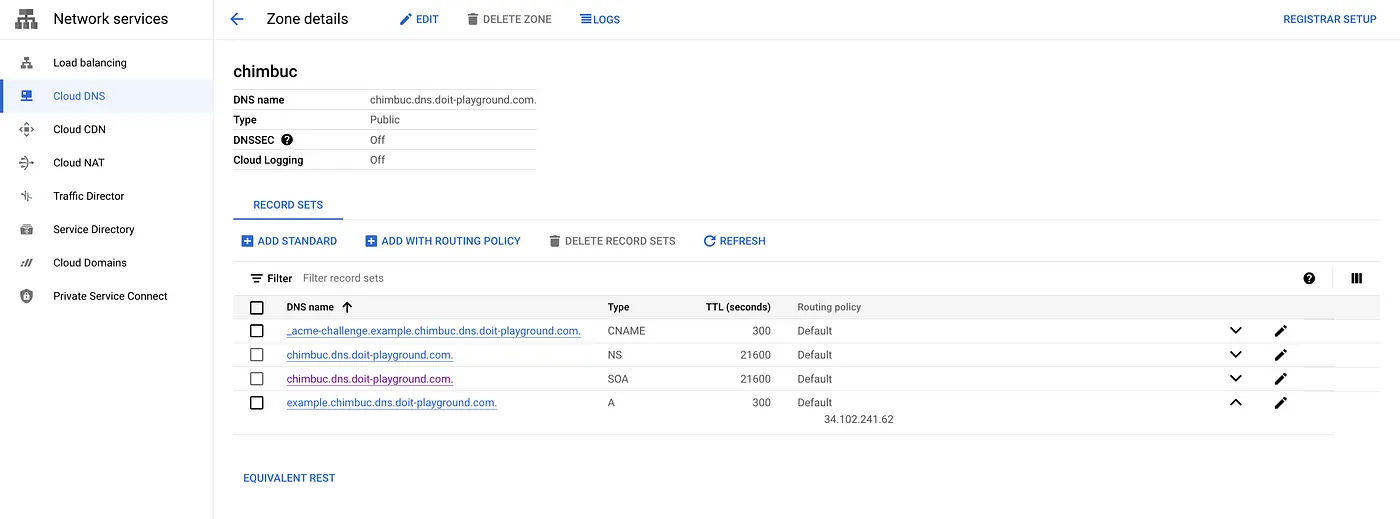
A record for example.chimbuc.dns.doit-playground.com
Conclusion
In conclusion, leveraging domain authorization in Google Cloud Platform (GCP) provides a significant speed improvement for SSL certificate provisioning compared to the traditional load balancer-based authorization method. By following the detailed steps outlined in this blog, you can efficiently set up domain authorization, create new TLS certificates, and strengthen the security of your GCP environment. This approach minimizes downtime and ensures a smoother transition.