We recently encountered a situation where a customer had lost access to a Windows Server instance hosted on the cloud. A user at the company had made an incorrect change to the Windows Firewall configuration. The result of that change was all users were unable to access the machine via RDP or otherwise.
Unfortunately, this is more common than we’d like to think, but on the positive side, it is correctable. With the hope that this article helps others, I’ll outline the simple steps that you can follow to resolve similar situations.
Unable to connect to the machine by other means, we opted to leverage the serial port connection option provided in the Google Cloud Web Console.
To restore access to the Windows instance we’ll walk through three steps. First, we’ll connect to the machine. Second, we’ll access a Windows command prompt. Last, we’ll disable the firewall to open RDP access to the machine. We’ll start at the point at which we are already signed into the Google Cloud Web Console.
To perform the steps in this article you will need the Google Cloud Platform (GCP) permissions listed.
- compute.instances.setMetadata
- compute.projects.setCommonInstanceMetadata
Step 1: Navigate and connect to the instance via a serial console
Once signed into the Google Cloud Web Console, navigate to the Compute Engine page to display the list of instances. Search and select the affected instance to display the Instance detail page.
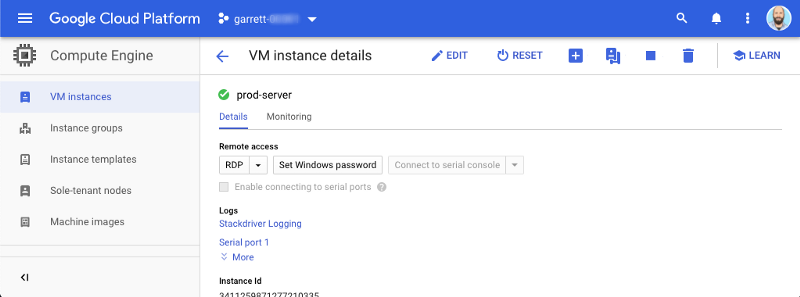
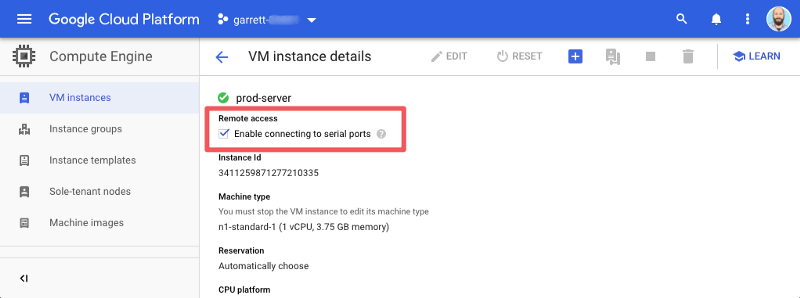
Ensure that serial console access is enabled by viewing the “Enable connection to serial ports” attribute. If it is not, you will need to enable it. To enable, select the “Edit” button, enable the “Enable connecting to serial ports” attribute and save the change.
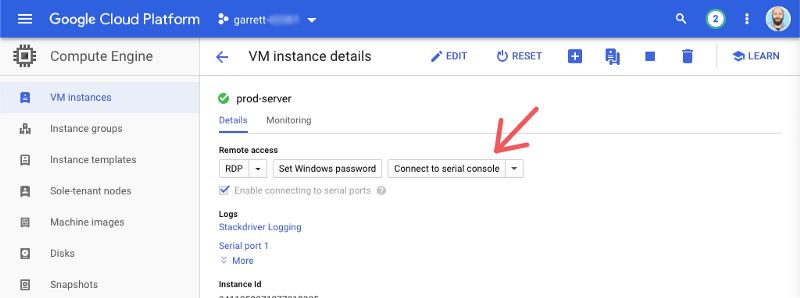
With serial port access enabled the “Connect to serial console” button will also be enabled. Select the button to open a serial console window. A new window will open and display the Windows Special Administration (SAC) Console.
The Windows SAC allows you to interact with the Windows Operating System (OS). The SAC provides OS access even when networking is not functional. It also provides a very basic set of commands for OS management.
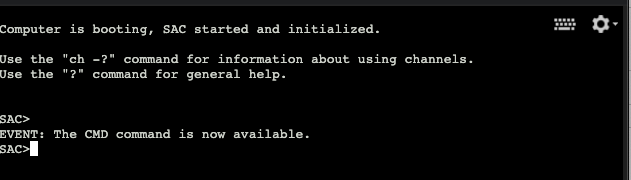
Tip: To learn more about the SAC terminal you can use the
? or thehelp command to display a list of commands available.
Step 2: Connect to a Windows command prompt
We need to work with the firewall commands which are not available in the SAC. To do this we’ll create a new channel that provides access to the Windows Command prompt that we all know and love.
In the SAC terminal, use the
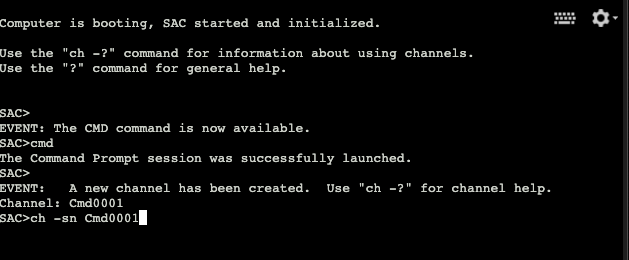
The system will display the new channel detail. Enter any key, aside from the
Enter
The Windows command prompt will provide full access to the machine. The system will prompt for credentials to authenticate as an authorized user. Enter the username, domain, and password. If the machine is not on a domain then leave the domain blank.

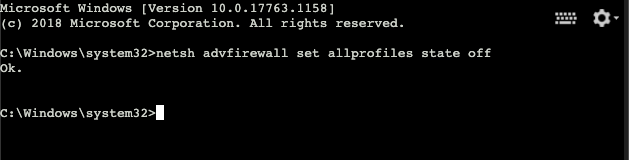
Step 3: Disable the firewall
Now that we’re authenticated on the machine we can perform the final step and disable the firewall rules that prevent machine access. For this, use the
Summary
The steps above we’ve walked through how to restore access to a Windows Server instance when blocked by the operating system firewall. Remember to disable the serial console access to protect the resource. GCP also provides a safety control to protect serial console access on all machines. Setting an organization policy on serial port access will override individual machine settings. For this feature, use the “Disable VM serial port access” on the Organization Policies page.
Additionally, GCP also records all serial console access into the cloud logs. To view these logs, navigate to the Logs menu in the GCP web console. On the logs page, filter on the “GCE VM Instance” resource and search on
There are some basic preventative steps to avoid these situations. Ensuring change control steps are in place will provide a historical record of actions. Change control records can help lead to the cause of incidents, the related resolution, and a faster recovery. Also, ensure that consistent backups are occurring. The Google Cloud Platform provides an excellent snapshot scheduling service for instances.
Want more stories? Check our blog, or follow Garrett on Twitter